Food has always been one of the most enduring ways that we share our culture. In Jewish homes around the world, recipes aren’t just meals. They’re memory, history, and connection, passed from one generation to the next.
In Eat Jewish: Over 100 Recipes That Blend Jewish Heritage, Modern Flavors, and Family Traditions, Jewish food creator and educator Melinda Strauss (@therealmelindstrauss) brings that story to life through more than 100 comforting kosher recipes that honour tradition while embracing modern cooking. Alongside the dishes, she weaves in thoughtful reflections on Jewish life, heritage, and the diverse flavours shaped by centuries of Jewish migration across the globe and through her own family recipes that have been passed down.
From challah and matzah ball soup to kugels, brisket, borekas, and holiday favourites, the recipes are approachable, deeply rooted, and designed for real life, whether you’re cooking for Shabbat, a celebration, or an ordinary weeknight. Strauss shares Jewish customs along the way, making the book as welcoming as it is informative.
We’re sharing three delicious recipes from Eat Jewish so that you can enjoy a taste of the warmth, history, and joy that come from gathering around the table and keeping food traditions alive.
You can buy Eat Jewish at Indigo and Amazon.
Classic Potato Latkes
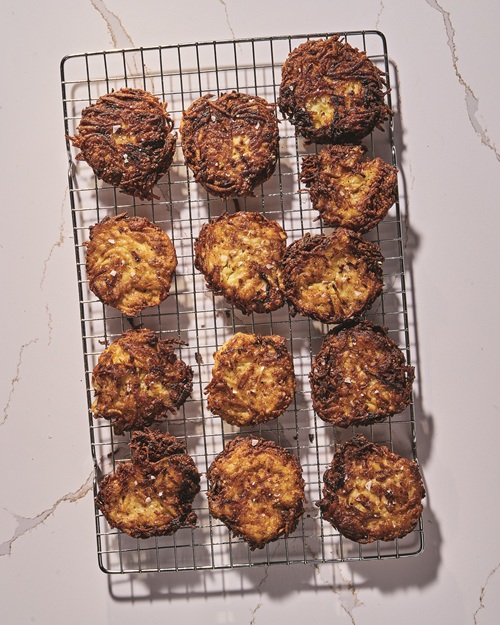
In keeping with the Chanukah tradition of eating foods fried in oil, potato latkes are an Ashkenazi staple. I like mine super thin and crunchy with frizzled edges, while my dad prefers his fluffier in the center—he achieves this by not only shredding the potatoes but also giving them a quick blend in the food processor. The great thing about a classic latke is that you can easily make it your own by experimenting with different spices and seasonings, including garlic powder, onion powder, paprika, ground cumin, Za’atar (page 39), chili flakes, or even a pinch of cayenne for heat. Fresh herbs like parsley, dill, or chives also add a flavorful twist. But the real question is, how do you top your latkes? Sour cream, applesauce, or maybe both?
A Latke Tip You Don’t Want to Skip
Add a peeled carrot to the oil while frying your latkes. The carrot acts like a magnet, attracting food particles (or I call it “schmutz”) that might otherwise burn, helping to keep the oil clean and your latkes crisp and golden.
note The latkes can be stored in an airtight container in the refrigerator for up to 5 days and in the freezer for up to 3 months. Defrost overnight in the refrigerator and reheat at 400°F (205°C/gas 6) in the oven until crispy, 10 to 15 minutes.
makes 24 latkes
2 pounds (910 g) russet potatoes, peeled
1 large yellow onion
½ cup all-purpose flour
2 large eggs, beaten
2 teaspoons kosher salt, plus more for garnish
½ teaspoon black pepper
Neutral oil, for frying
1 medium carrot, peeled and cut in half, for the oil
Sour cream, for topping (optional)
Applesauce, for topping (optional)
Place a wire cooling rack on a baking sheet next to the stove. Line a large bowl with a clean kitchen towel.
Using a food processor or a box grater, shred the potatoes and onion and transfer them to the prepared bowl. Gather the edges of the towel to form a bundle, then twist the top tightly to close. Hold the bundle over the bowl and twist and squeeze firmly to extract as much liquid as possible. Discard the liquid. Add the potatoes and onion back into the bowl without the towel, along with the flour, eggs, salt, and pepper and stir until fully incorporated.
In a large skillet, heat ¼ inch (6 mm) of oil over medium-high heat until it shimmers, about
2 minutes. Add half of the carrot to the oil. Using a ¼ cup (60 ml) measuring cup, scoop out the latke mixture and drop 3 or 4 scoops carefully into the pan, making sure not to crowd them. Flatten lightly with the bottom of the measuring cup and fry until golden brown, about 2 minutes per side. Transfer to the prepared rack and sprinkle with salt. Repeat with the remaining mixture, adding more oil to the pan as needed. When the carrot in the oil looks burnt, remove it from the pan and replace it with the other half.
Transfer the latkes to a platter and serve hot with sour cream (if using) and/or applesauce
(if using).
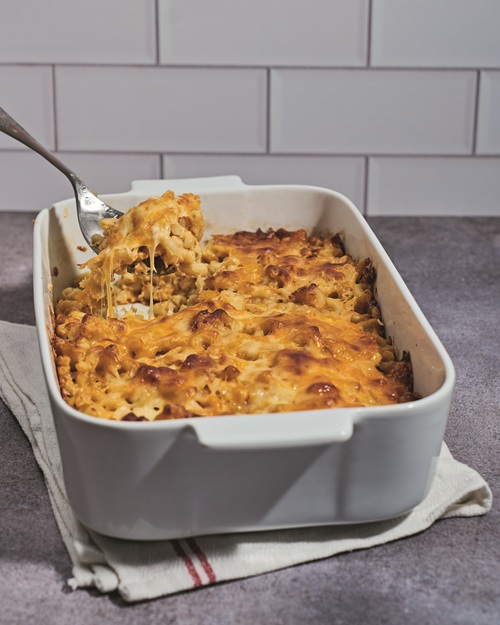
Mom’s Baked Macaroni and Cheese
serves 8 to 10
Unsalted butter or cooking spray, for greasing
1 tablespoon plus 1 teaspoon kosher salt, divided
1 box (16 ounces, or 455 g) elbow pasta
3 tablespoons unsalted butter
3 tablespoons
all-purpose flour
½ tablespoon paprika
½ teaspoon black pepper
2 cups (480 ml) whole or 2% milk
2 cups (240 g) shredded Cheddar cheese, divided
2 cups (220 g) shredded mozzarella cheese, divided
This is my ultimate comfort food! Growing up, we ate this mac and cheese all the time, especially before a fast day because it’s so filling. To this day, I still love making it to prepare for an upcoming fast.
note The macaroni and cheese can be stored in the refrigerator in an airtight container for 3 to 4 days and in the freezer for up to 3 months.
1 Preheat the oven to 375°F (190°C/gas 5) and grease a 9 by 13-inch (23 by 33 cm) baking dish with butter or cooking spray.
2 Heat a large pot of water to boiling over high heat and add 1 tablespoon of the salt. Add the pasta and cook for 1 minute less than the package directs for al dente. Drain.
3 In the same pot, melt the butter over medium heat. When bubbling, whisk in the flour until it is absorbed and the mixture is beginning to brown, about 30 seconds. Add the paprika, the remaining 1 teaspoon salt, and the pepper and whisk to combine. Slowly stir in the milk, whisking constantly until the mixture is bubbling and thick, 5 to 7 minutes. Add
1½ cups (180 g) of the Cheddar and 1½ cups (165 g) of the mozzarella and stir until the cheese is melted and the sauce is smooth, about 2 minutes. Add the pasta and stir until evenly coated. Taste and adjust seasoning as desired.
4 Add the cheesy pasta to the prepared baking dish, smoothing it into an even layer. Top with the remaining ½ cup (60 g) Cheddar and the remaining ½ cup (55 g) mozzarella.
5 Bake until golden brown, 30 to 35 minutes. Let cool slightly, about 15 minutes.
6 Serve family style in the dish.
Gluten-Free Chocolate Chip Cookie Cake
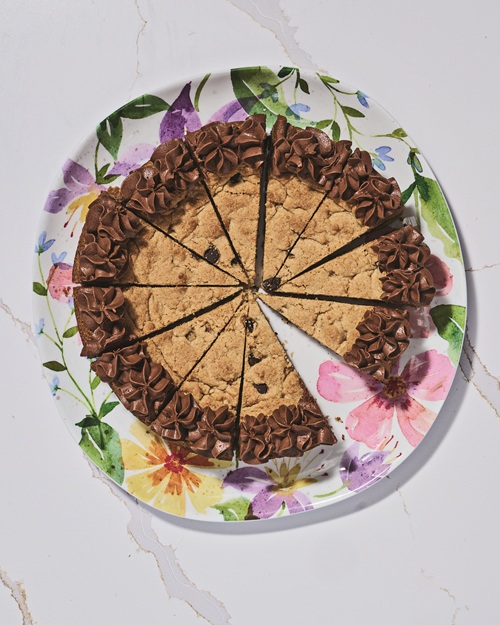
You would never guess this cake is gluten-free! It’s also perfect for Pesach. Back in my food-blogger days, I’d bake my own birthday cake each year and write a post about it, and one year, my birthday fell during Pesach. That meant no all-purpose flour and no traditional birthday cake, so I created an almond flour layer cake filled with chocolate ganache and buttercream—and that became the inspiration for this recipe! I like to keep this as a single layer because it’s so rich, with chocolate ganache frosting piped all around the edges.
note The cookie cake can be stored at room temperature in an airtight container for up to
3 days and in the freezer without the frosting for up to 3 months. Frosting can be made and stored at room temperature 2 to 3 days in advance.
serves 6 to 8
CHOCOLATE CHIP COOKIE CAKE
Cooking spray, for greasing
1½ cups (144 g) almond flour
½ teaspoon baking powder
¼ teaspoon baking soda
½ teaspoon kosher salt
1 large egg
½ cup (100 g)
granulated sugar
¼ cup (60 ml) neutral oil
1 teaspoon vanilla extract
½ cup (90 g) semisweet chocolate chips
CHOCOLATE FROSTING
¼ cup (55 g) unsalted
butter or vegan butter,
at room temperature
¾ cup (90 g)
confectioners’ sugar
¼ cup (25 g) unsweetened cocoa powder
1 tablespoon milk
or non-dairy milk
1 teaspoon vanilla extract
Pinch of kosher salt
Preheat the oven to 350°F (175°C/gas 4). Grease a 9-inch (23 cm) round cake pan with cooking spray and line the bottom with parchment paper.
Make the cookie cake: In a medium bowl, whisk the flour, baking powder, baking soda, and ½ teaspoon salt. In a small bowl, whisk the egg, granulated sugar, oil, and vanilla until smooth; add to the flour mixture and stir until a thick batter forms. Fold in the chocolate chips. Transfer to the prepared pan. Bake until lightly golden brown and a toothpick inserted into the center comes out clean, 25 to 30 minutes. Let cool slightly. Set a cooling rack on top of the pan and carefully invert the cake onto it. Peel off the parchment and let cool completely.
Meanwhile, make the frosting: Using a stand mixer fitted with the paddle attachment, beat the butter at medium-low speed until creamy, about 1 minute. Add the confectioners’ sugar and cocoa powder and mix at low speed until fully incorporated, about 30 seconds. Add the milk, vanilla, and pinch of salt; mix at medium-low speed until light and fluffy, about 2 minutes. Transfer the frosting to the piping bag. Pipe frosting around the border of the cake. Slice and serve.